
In part one of our blog series on how to use Burp Suite Professional for web application security, we walked you through the steps to get started. In part two, we’ll show you how to use Burp Suite as a web application security testing tool in a practical setting.
For this purpose, we’ll be using the Damn Vulnerable Web Application (DVWA) as our practice site. As the name suggests, DVWA is a vulnerable PHP/MySQL web application. It is designed to help security professionals test their skills and tools in a legal environment, help developers understand the processes they need to secure web applications, and as a tool to teach web application security.
For this tutorial, I’ve loaded up the DVWA ISO on my local machine:

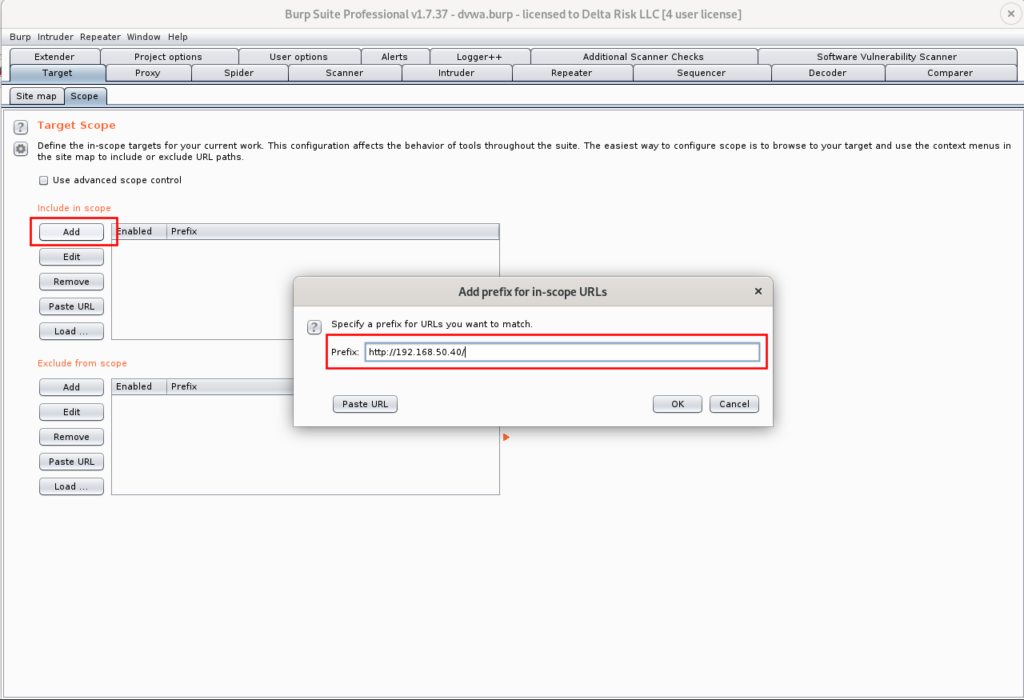
To get started assessing any web application with Burp, the website must be added to the target scope. This is a crucial step in the assessment process and should always be verified against the scope and Rules of Engagement (ROE) for the assessment. Let’s get this DVWA added to our scope.
This can be done in under the Target tab: Target -> Scope -> Add
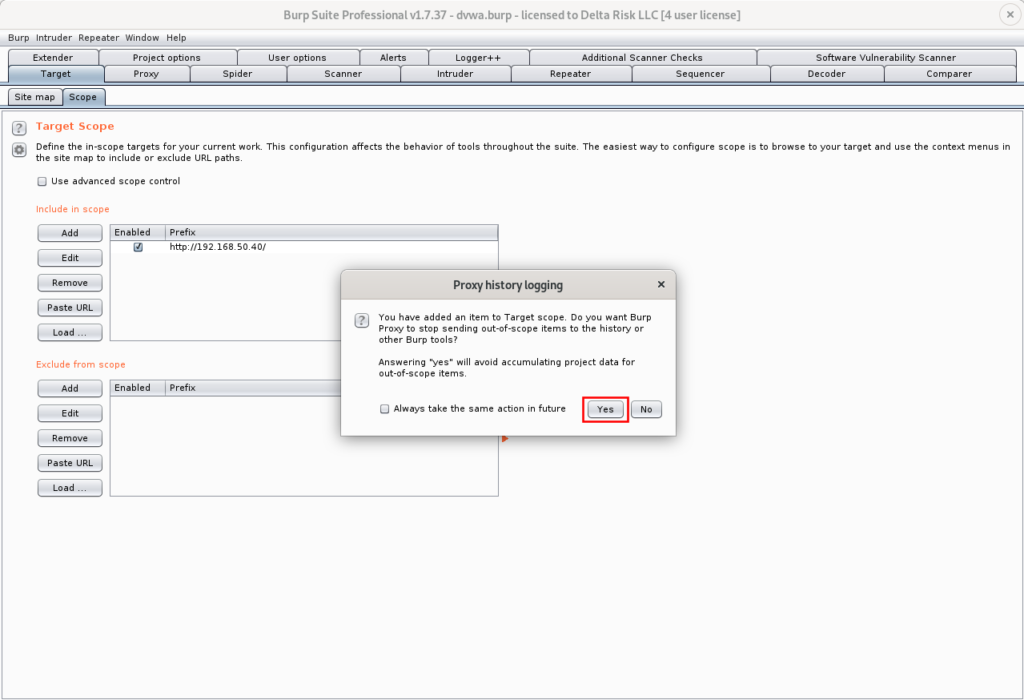
After successfully adding a target, Burp will ask if you’d like to stop sending out-of-scope items to history or other Burp tools. Selecting ‘Yes’ on this prompt help you limit the size of your Burp project, as well as ensuring no out-of-scope requests are automatically executed.
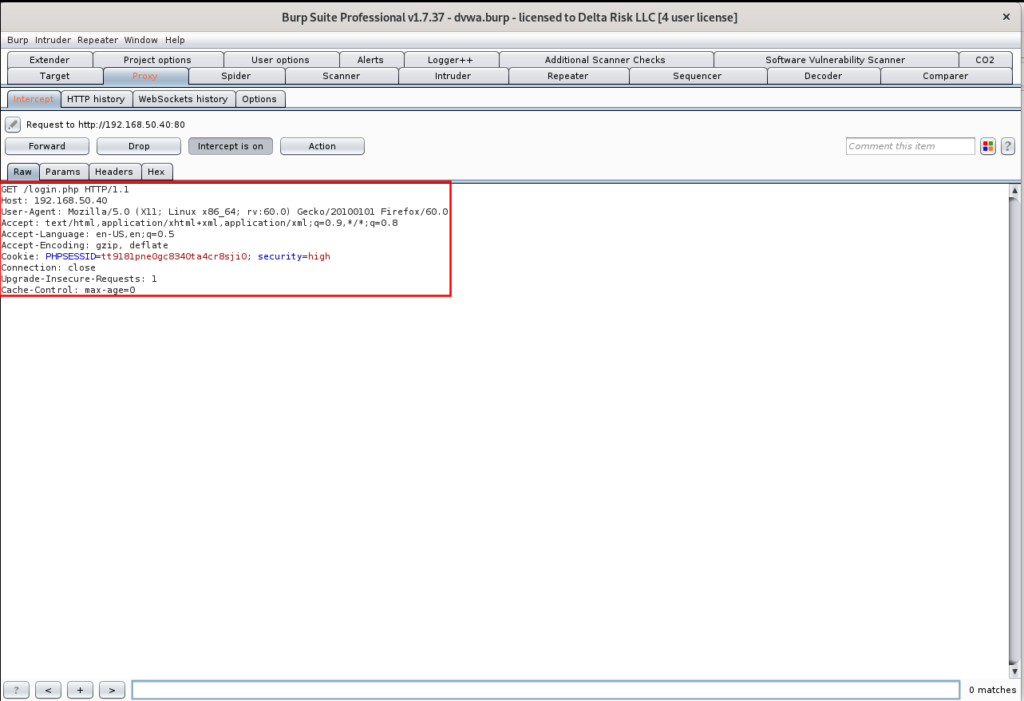
We’re now ready to capture our first web request with Burp. First, ensure the “Burp” option is selected in your FoxyProxy dropdown as shown in Figure 17. Then navigate to the Proxy -> Intercept tab, and ensure that “Intercept” is on, as seen in Figure 21.

Turning on the “intercept” switch will allow Burp to capture and hold the next web request that is performed through Firefox. Here, we’ll be capturing and spidering the “login.php” request from the DVWA homepage as seen in Figure 18. With the Burp option selected in FoxyProxy, and the “intercept” switch on, refreshing the Firefox browser captures the following:
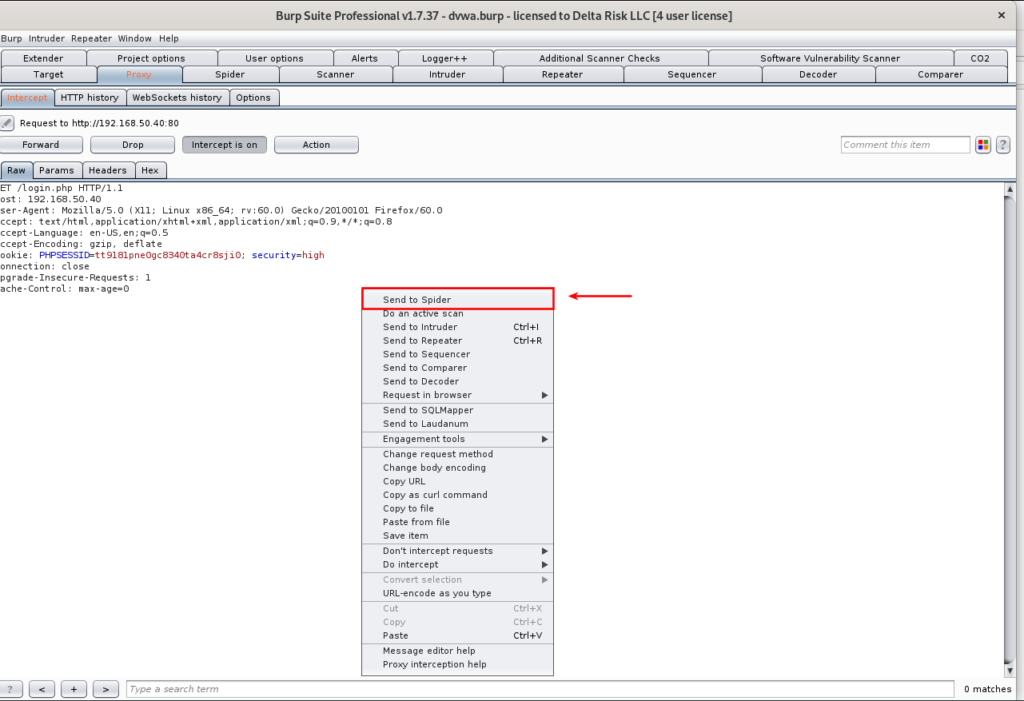
As seen in Figure 22, the request was successfully captured. From this point, we can execute multiple different actions. With the application already set in our target scope, we’re going to right-click in the “Intercept” screen, and we’re going to send to Spider.
After sending the request to the “Spider,” we can see that the site map of the DVWA can be seen in the site map:
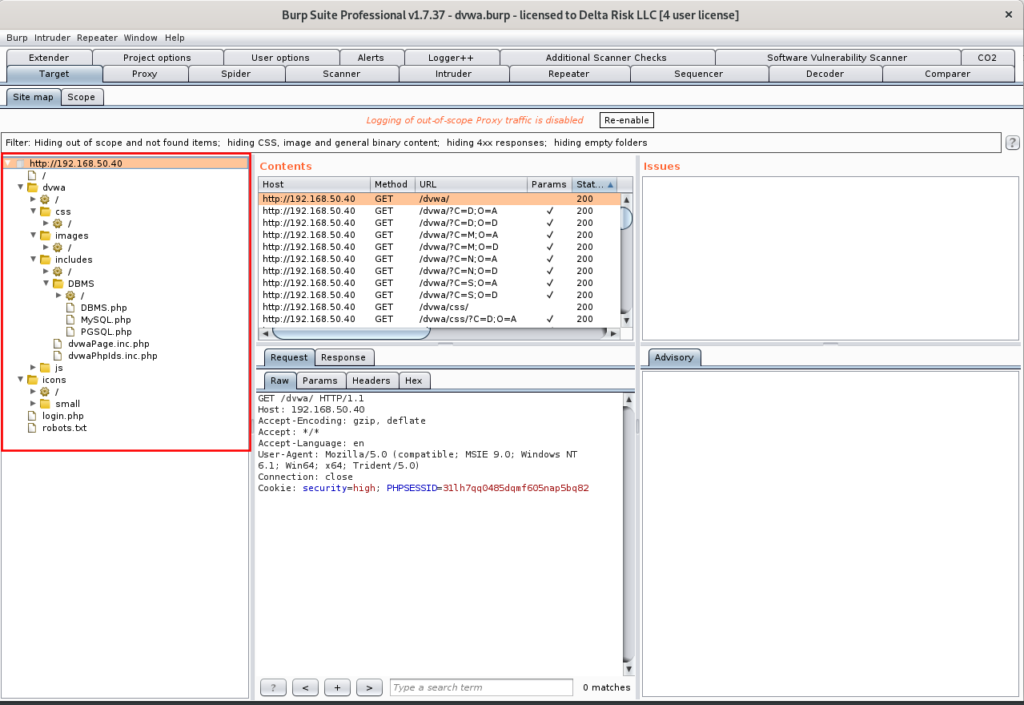
Here you can manually browse through the identified pages, and functions detected during the spidering process. Browsing the pages will show you the requests and responses sent through Burp, along with the GET and POST details.
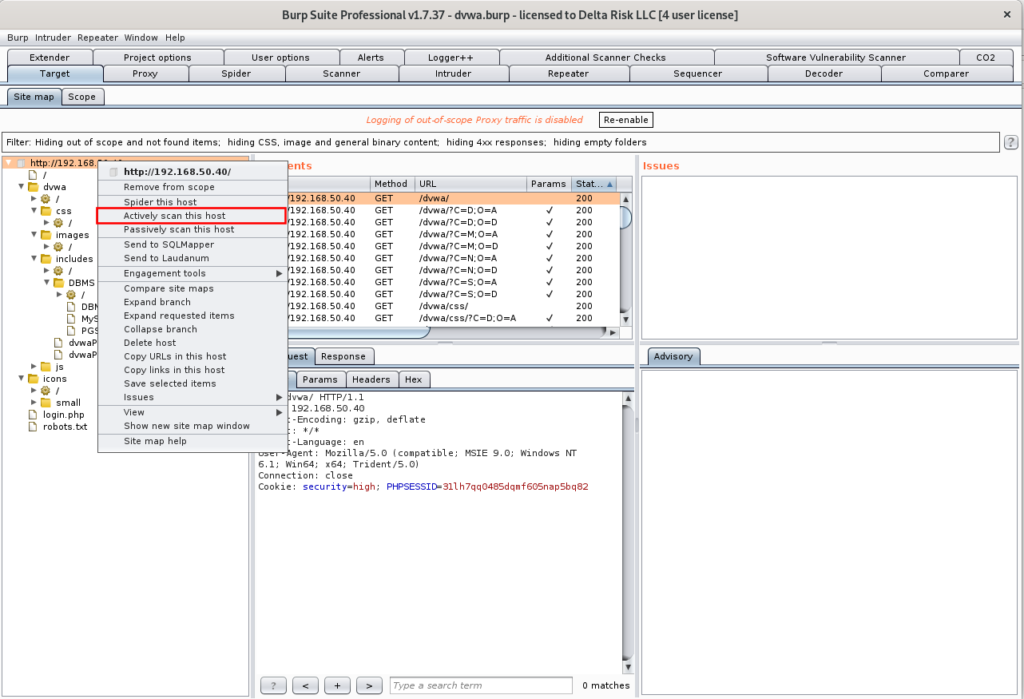
The last thing we’re going to do is actively scan the sitemap Burp identified. This will use the excellent Burp scanning engine, as well as the extensions we’ve added to identify possible vulnerabilities and exploits in the targeted application. To do this, right-click the root of the sitemap, and select “Actively scan this host.”
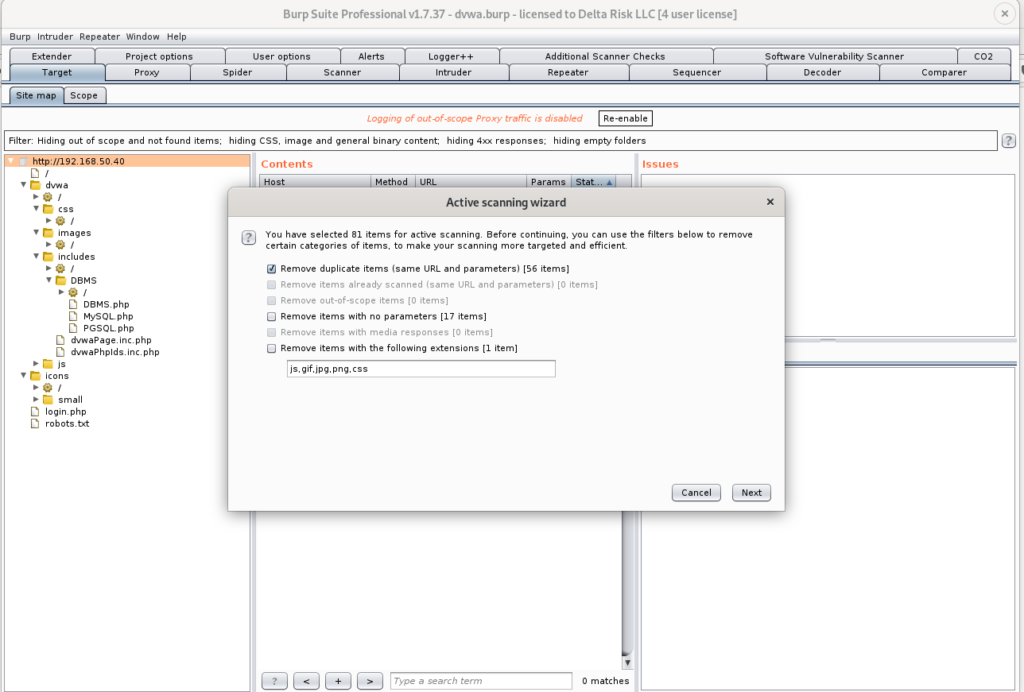
Prior to executing any scans, the “Active Scanning Wizard” will appear, giving you details of the number of items being scanned, as well as some additional options to check, or uncheck. We are going to leave everything as default for now.
After executing the scans, you can see the progress (Scanner > Scan Queue), and current results in Figure 27.
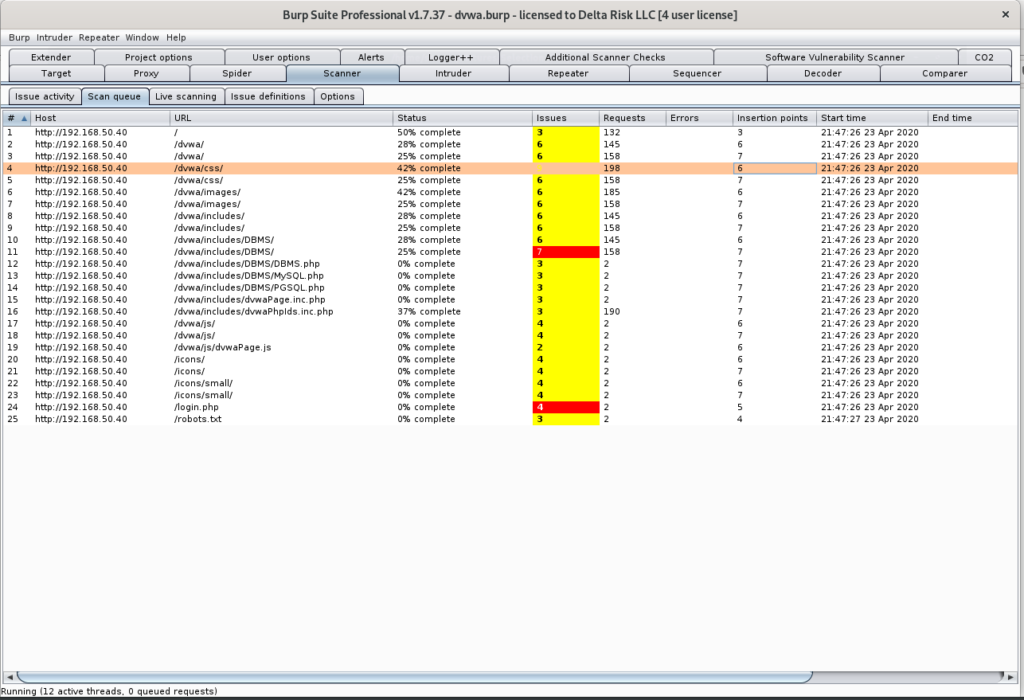
The “Scan Queue” breaks down the Host, URL, Status, Issues, and timestamp of the items being scanned.
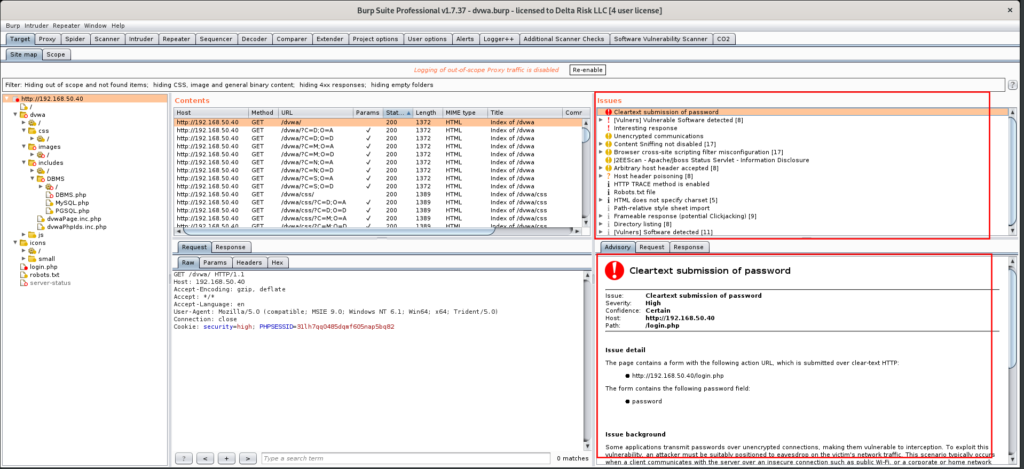
The live results of the scans running can always be seen by clicking on the root of the URL in the sitemap. In the “Issues” and “Advisory” windows, as shown in Figure 28, you can browse through the detected vulnerabilities, read information on the background of the issue, and see the requests and responses transmitted.
The issues are categorized by severity, which can be viewed by the color of the alert next to the issues. The “cleartext submission of password” is categorized as a “high” in this case. Burp can often generate many false positives during the scanning phase, so manual validation of critical findings is necessary.
Summary
Burp Suite Professional has a lot of great features and testing capabilities for any web applications assessment, and is an invaluable tool for pen testers. At this point, you should be able to fire up Burp, target the in-scope applications, and perform initial scanning and testing procedures. Tackling the initial nuances of Burp Suite Professional can be a bit daunting right off the bat, however, becoming fluent with the proxy tool will add another tool to your testing arsenal. Happy Burping!