
Burp Suite Professional is one of the most popular penetration testing and vulnerability finder tools, and is often used for checking web application security. “Burp,” as it is commonly known, is a proxy-based tool used to evaluate the security of web-based applications and do hands-on testing. With more than 40,000 users, Burp Suite is the world’s most widely used web vulnerability scanner. It has a robust and modular framework, and is packed with optional extensions that can increase web application testing efficiency.
If you’ve just purchased your Burp Suite Professional license and you’re wondering what the next steps are in your web application testing journey, we’ll provide some tips in this blog. We’ll cover how to get Burp up and running, basic functionality and navigation, potential pitfalls, and how to install plugins through Burp Suite’s app store, BApp.
Getting Started with Burp Suite Pro
Before hitting the terminal and getting our first Burp project started, let’s make sure we have all the tools, additional software, and prerequisites covered. This will save a lot of time moving forward and will ensure you can get Burp set up in any new environment.
Software and tools checklist:
- Kali Linux (Free) – For purposes of this blog, we will be using Kali Linux, a free penetration testing oriented distribution developed and maintained by Offensive Security.
- Burp Suite Professional ($399/yr.) – An advanced set of tools for testing web security, all within a single product, from a basic intercepting proxy to a cutting-edge vulnerability scanner.
- Firefox – Web browser that comes installed by default on Kali Linux.
- FoxyProxy – Free Firefox extension that automatically switches an Internet connection across one or more proxy servers based on URL patterns. Put simply, FoxyProxy automates the manual process of editing Firefox’s Connection Settings dialog.
- Jython (JAR file) – Jython is an implementation of the Python programming language designed to run on the Java platform.
- JRuby (JAR file) – JRuby is an implementation of the Ruby programming language atop the Java Virtual Machine, written largely in Java. It is free software released under a three-way EPL/GPL/LGPL license.
With all the necessary tools downloaded, let’s boot up our Kali Linux VM and see how all the pieces come together.
After booting into Kali, place the following files into a newly created (or existing) Burp directory. This can be wherever you’d like. For this example, the file will be in /root/tools/burp/.
- Jython JAR File
- JRuby JAR File
- Burp Suite Pro License
- Burp Suite Pro

For this guide, we’ll use Burp Suite Pro Version 1.7.37. This is not the most up-to-date version, but it’s my favorite. I prefer to start Burp via the command line and set the limit of the amount of RAM assigned to it. At times, Burp can begin to use a large amount of system resources which can noticeably slow your system down. If the system you’re operating on has limited resources, this will be your favorite method of starting Burp.
After opening a terminal, we’re going to navigate to our /root/tools/burp directory. From there, we are going to execute the following command:

java -jar -Xmx2G /root/tools/burp/burpsuite_pro_v1.7.37.jar –project-file=testproject.burp
Let’s break down this command to see what each component is doing:
java -jar -> Calling Java to execute the JAR file we specify
-Xmx2G -> Specifying that we only want a max of 2G of RAM assigned to Burp
/root/tools/burp/burpsuite_pro_v1.7.37.jar -> Directory path to our Burp Suite Pro JAR file
–project-file=testproject.burp -> Allows us to create a Burp project file along with the start of the program. You can replace ‘testproject.burp’ with whatever name you’d like. Just ensure you keep “.burp” at the end.
Entering the above in the command line launches Burp Suite Professional and creates a project file for the session. All raw data generated during the following Burp session will be saved to this file.*A word of caution: during an engagement with several large applications, this file can grow to be several gigabytes in size.
Before the Burp interface launches, you must enter your license key and activate it via the PortSwigger license servers:
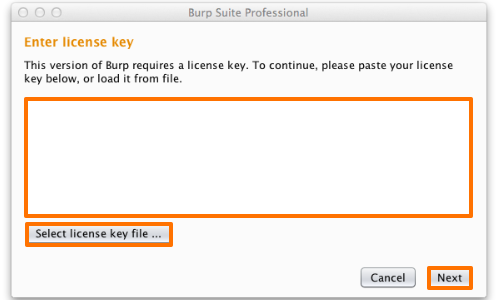
Click the “Select License Key File” button and browse to where your Burp Suite Pro license is. In this case it’s in /root/tools/burp/Burp_Suite_Pro_License.txt.
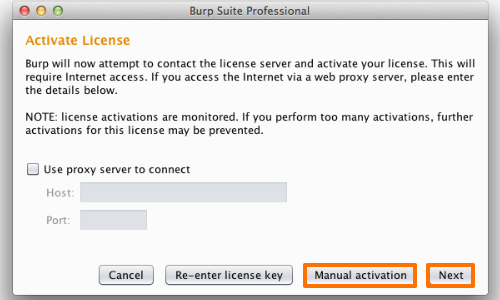
After selecting the license, click next and activate your license against the PortSwigger activation server.
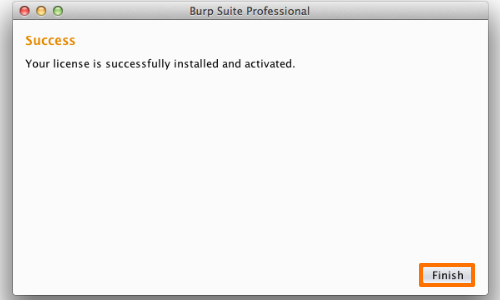
After successful activation, you’ll be presented with the above screen. We’re now ready to get started with Burp!
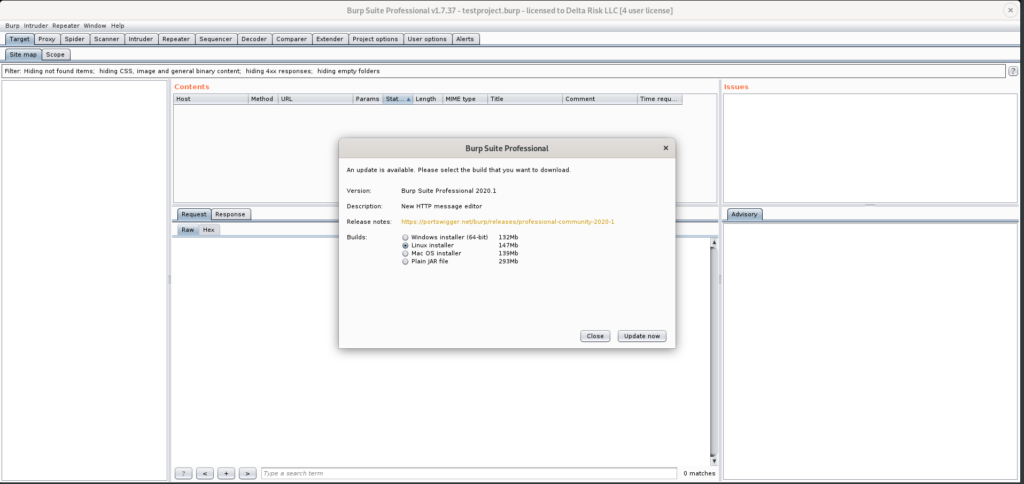
If Burp is being started with a version that’s not the most up to date, you’ll be prompted to update to the latest version. We’re not going to update our current version at this time. However, this prompt will appear each time Burp is started. So next, we’ll select close.
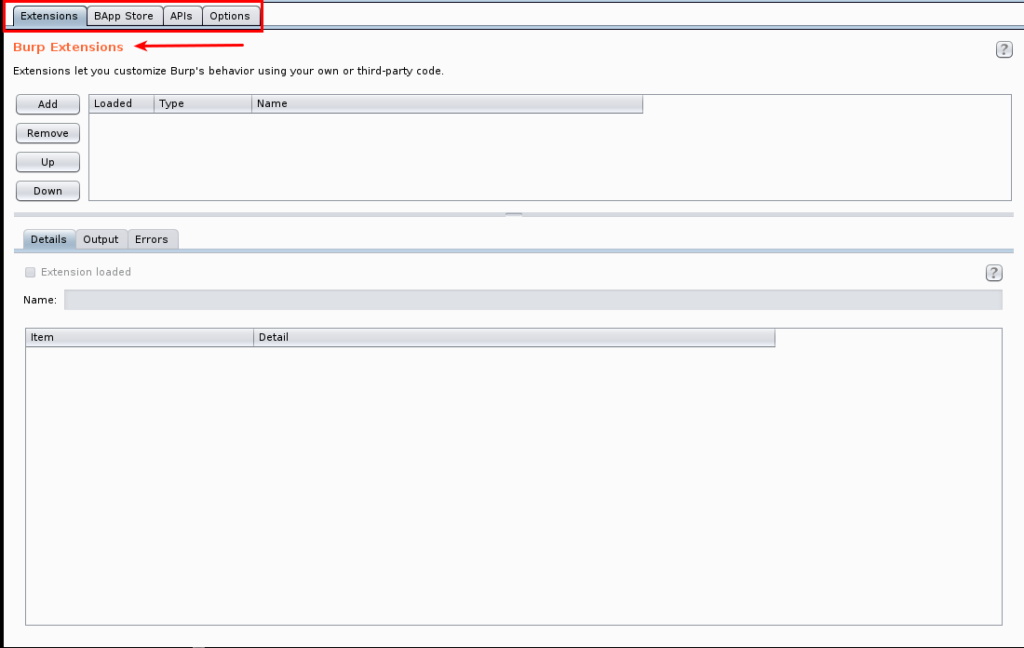
Before moving onto using Burp, let’s get a few housekeeping items out of the way, to ensure we have smooth sailing moving forward. At the top of the Burp GUI you’ll see the following tabs:

Each one has their own specific functionality and allows the user to easily navigate and leverage the powerful modules included in Burp. Mastering the functionality of each of these takes some time, as learning the nuances of each is a tutorial by itself. I strongly recommended that you spend as much time as you can in each of these, familiarizing yourself with the inner workings of Burp. For this walk through, we’ll mainly be using the Target, Proxy, Spider, and Scanner tabs.
First, let’s integrate those additional Jython and JRuby JAR files we downloaded earlier. This will allow us to utilize some excellent Burp extensions that can be found in the BApp Store. Click the “Extender” tab. This tab allows for additional functionality to be added to Burp via customized Burp extensions, APIs, and readily available extensions written by the Burp team, and fellow community members.
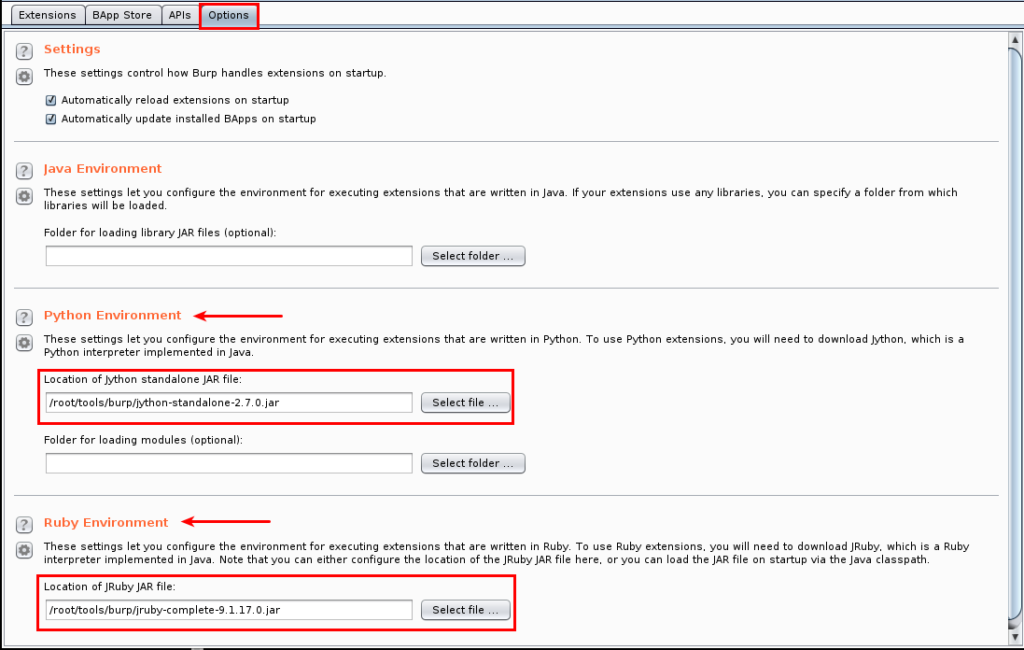
The tab that we’re first going to be interacting with is the ‘Options’ tab. Here, as seen in the screenshot below, we’re going to pointing Burp to the Jython and JRuby JAR files that are in the /root/tools/burp directory. Click the ‘Select File’ button and navigate to where the JAR files are stored. The end results should be like what’s shown in Figure 8. There is no ‘Save’ or ‘Apply’ button that needs to be used after selecting the files. Once they’re selected, it’s saved.
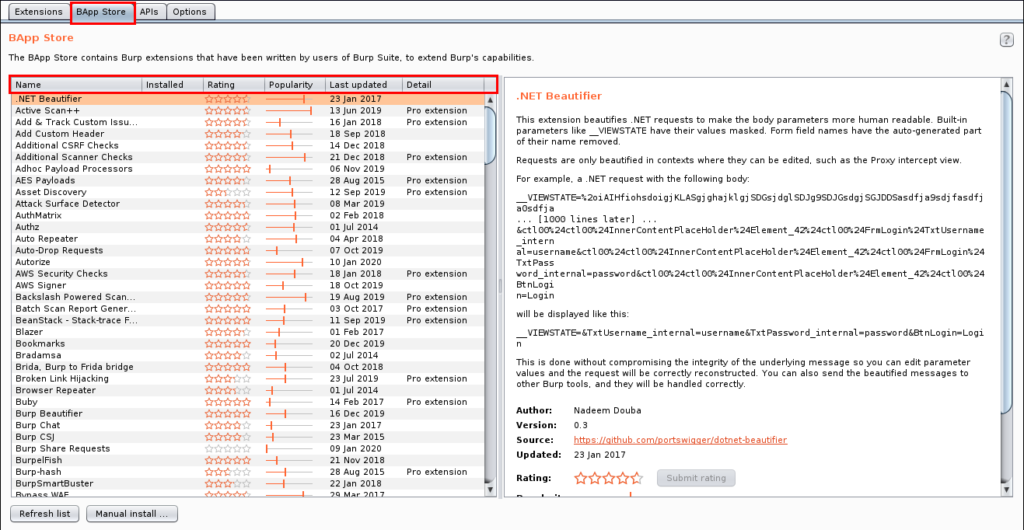
Navigating the Burp App Store (BApp) for Plugins
Next, we’re going to navigate to the Burp App Store (listed as BApp Store in the tabbed navigation). There are many additional plugins that are at our disposal here. There are far too many to list, but they range from extensions to the scanning functionality of Burp, to exploit specific plugins like CSRF, SQLi, XSS, etc. For the installation here, I’m going to list my personal favorites that I load up each time I launch Burp Suite.
Recommended Extensions
- Active Scan++ – Extends Burp Suite’s active and passive scanning capabilities. Designed to add minimal network overhead, it identifies application behavior that may be of interest to advanced testers.
- Additional Scanner Checks – This extension provides some additional passive Scanner checks.
- CO2 – This extension contains various modules for enhancing Burp’s capabilities: SQLMapper, User Generator, Name Mangler, CeWLer, and more.
- J2EE Scan – The goal of this extension is to improve the test coverage during web application penetration tests on J2EE applications. It adds some new test cases and new strategies to discover a different kind of J2EE vulnerabilities.
- Logger ++ – This extension can be used to log the requests and responses made by all Burp tools and display them in a sortable table. It can also save the logged data in CSV format.
- Software Vulnerability Scanner – This extension scans for vulnerabilities in detected software versions using the Vulners.com API.
The extensions mentioned above are by no means the ‘best,’ per se. They are simply the extensions I personally like to use when testing. I strongly recommend each pen tester explore the BApp store to find which extensions are best suited to each engagement type and testing methodology.
Before beginning any actions with Burp there are a few housekeeping items I like to complete. These can vary from assessment to assessment, but you should consider them before proceeding with any testing.
- Disable Automatic Project Backups
- User Options -> Misc.
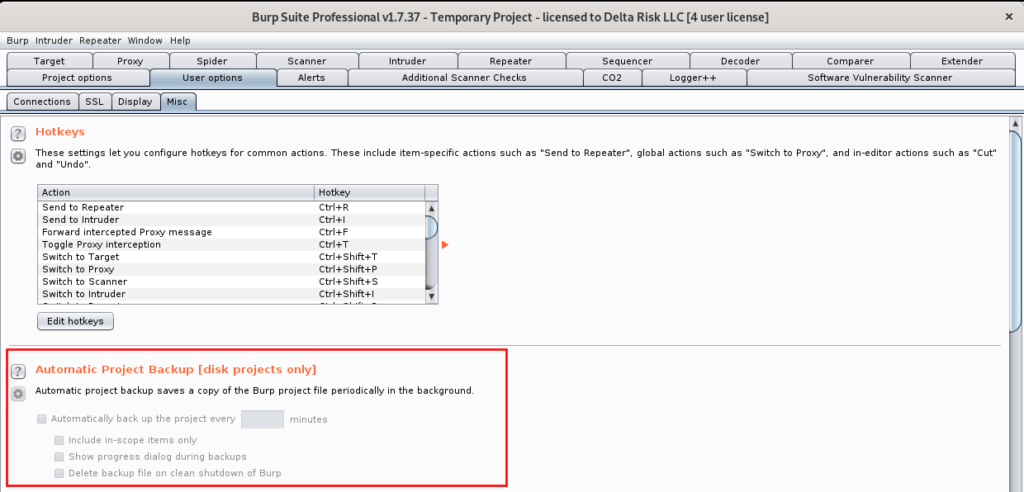
If you’re working on a virtual machine (VM) or system with low storage space, neglecting to edit this option can be a real hassle. If unchecked, Burp with automatically backup your project file every 30 minutes. While this is great to ensure project files and progress are saved, a large testing scope can create a large project file. I’ve often had this crash my Burp instance or wreak havoc on my VM’s memory. I prefer manual management of my backups, but the settings here are for you to decide. If left set to automatic backups, I recommend every 90 to 120 minutes.
- Disable Automatic Spider Form Submission
- Spider -> Options
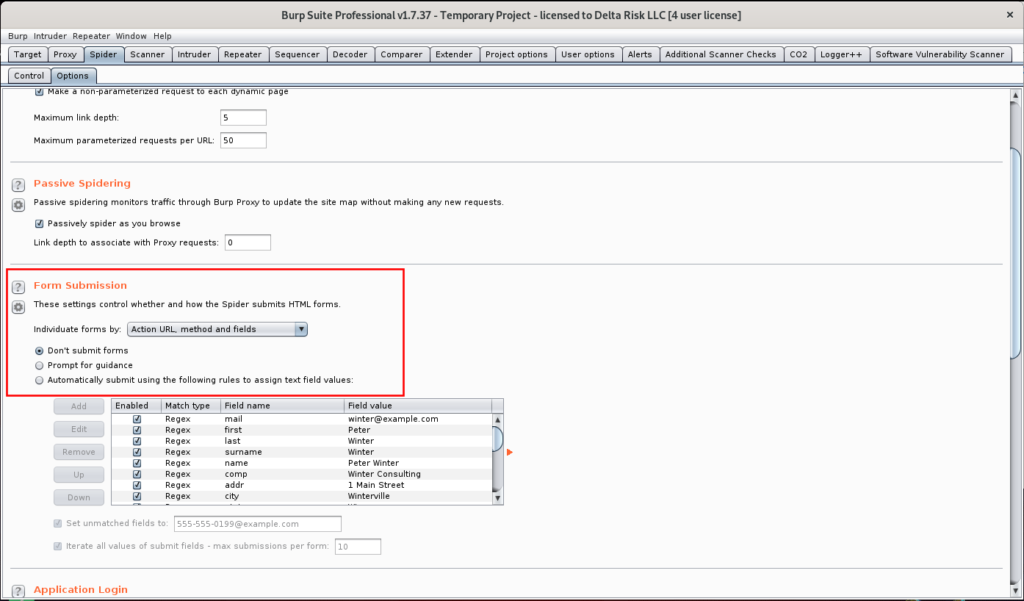
Prior to spidering any applications, this is another important option to consider. If the target application contains any authentication or form submission portals, leaving this option enabled can potentially create numerous junk records, and possible IP/account lockouts. Burp will automatically submit data into detected form fields and submit them on your behalf. This is another area I prefer to test manually, to make sure no records are created outside of what’s necessary.
- Ensure all automated scanning activities are limited to in scope targets
- Scanner -> Live Scanning
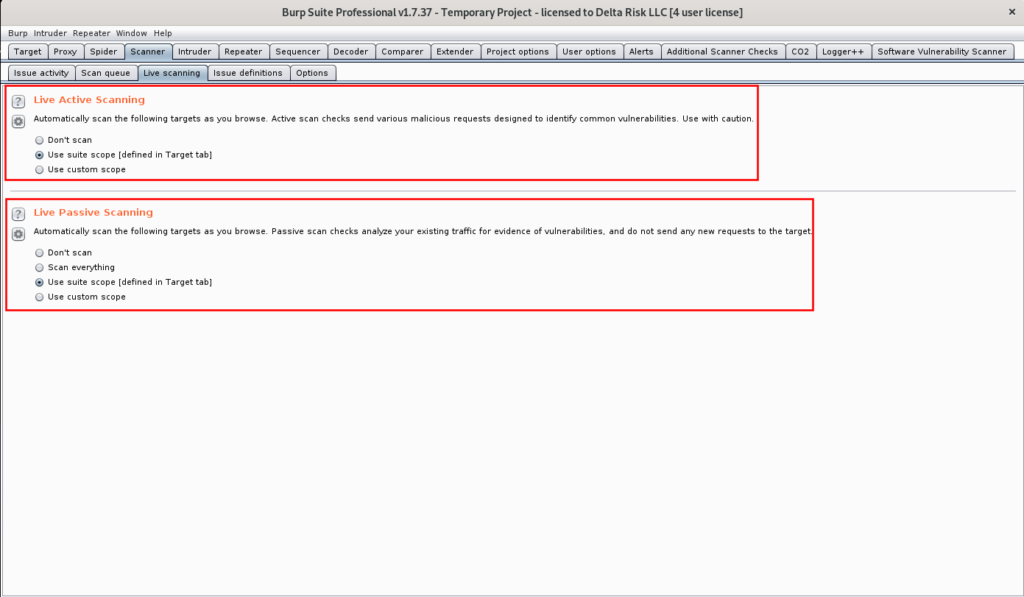
Lastly, setting the correct options in the “Live Scanning” tab ensures that no out of scope items will be inadvertently scanned. Without proper configuration, Burp will passively scan any sites passed through its proxy while browsing (which is seen in the bottom box of Figure 11). The live Active scanning options (when set to the use “suite scope”) will actively scan any pages you manually browse to during the assessment. This option is ultimately is decided by the assessor and should be set by your discretion.
Setting up FoxyProxy for Burp Suite Pro
Now that we have Burp set up with the necessary configurations, the last thing required is to get FoxyProxy set up in our browser (Firefox in this case). FoxyProxy is “a Firefox extension which automatically switches an Internet connection across one or more proxy servers based on URL patterns. Put simply, FoxyProxy automates the manual process of editing Firefox’s Connection Settings dialog.”
Adding this extension to your browser for web application testing can save a huge amount of time, as switching the proxy on and off is a click away.
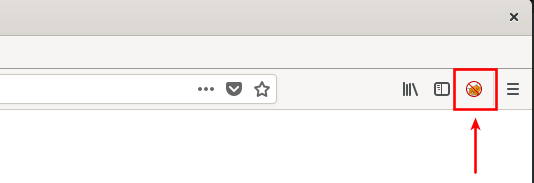
The link to this extension can be found here. Simply browse to it and select “Add to Firefox.” After doing so, you’ll see a Firefox emblem in the top corner of your browser as seen in figure 13.
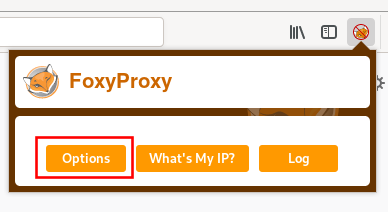
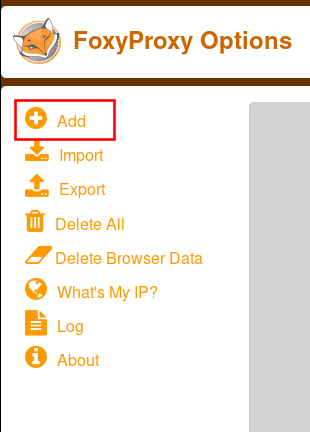
The last step is to configure FoxyProxy to work with Burp. To do this, select the FoxyProxy icon, then “Options,” as seen in Figure 14.
Next select “Add,” as seen in Figure 15.
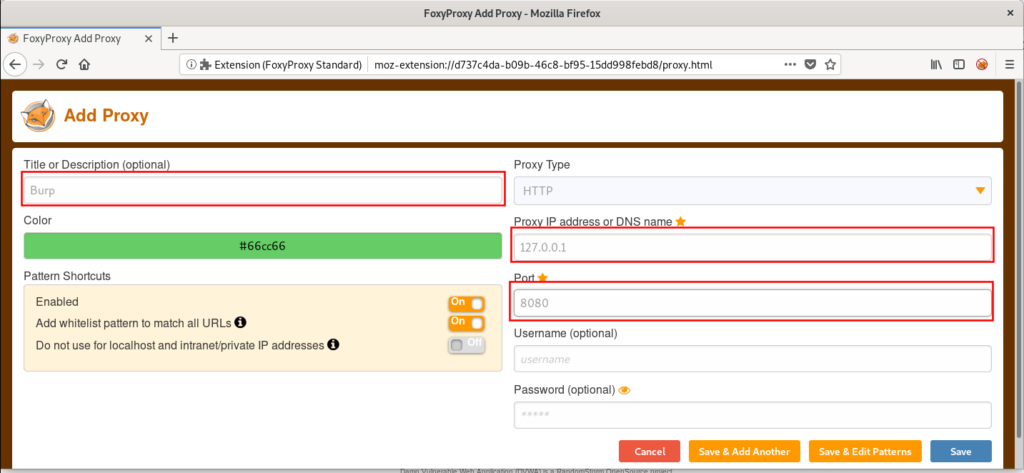
Lastly, select fill in the “Title,” “Proxy IP,” and “Port,” as seen in Figure 16. Then select “Save.”
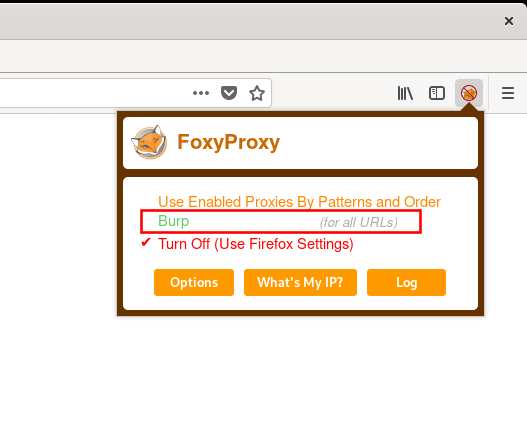
You can now see a “Burp” option in the FoxyProxy dropdown.
Summary
Once you’ve gone through these steps, you will have completed the required prerequisites for Burp Suite Professional. In our next blog, we’ll show you how to use Burp Suite in a practical setting as a web application security testing tool.